On recording video lectures
I was supposed to have presented some lectures at the university, but due to covid-19 they are now to be recorded as videos. Fortunately, in the age of Twich and youtube, there are pretty good options for recording lectures. I ended up using obs Studio and Pympress for recording lectures.
I am giving a couple of lectures at the university; these are “asynchronous”1, i.e. I record a video that students can view at their own leisure (like youtube).
I have never done video lectures before. Ideally, to give video lectures, I would want a setup that would allow me to:
- Easily switch between a video of me and a video of the slides maybe with a small “talking head” while presenting slides2
- Record a the presentation slides only, not the entire desktop (for my privacy)
- Have somewhat crisp audio and remove background noise
- See my presenter notes as I record
- Highlight elements on the presentation as one would do irl
Open Broadcaster Software (obs) Studio is a wonderful screen recorder
that makes it easy to deal with point 1, 2 and 3. For notes and
highlights (point 4 and 5) the presentation tools Pympress and
pdfpc work pretty well, and importantly split the slides into two
different windows, aiding point 2. This means I can record the
presentation window in the background while keeping the presenter view
with my notes in the foreground.
tl;dr of recording lectures with obs Studio
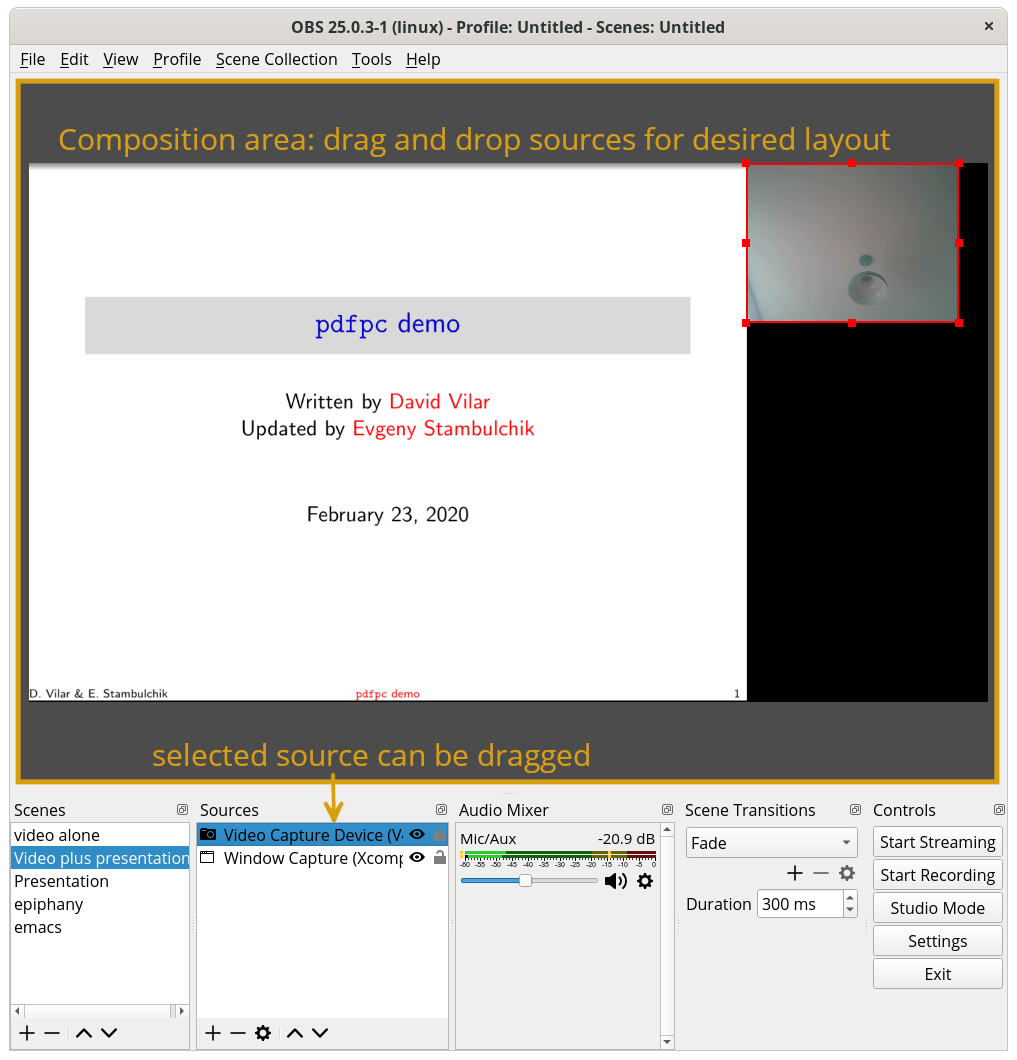
- Configure what should be recorded and how it should look with “Scenes”, “Sources” and the “layout composer”; configure shortcuts to switch scenes if using more than one scene (Settings → Hotkeys). (See obs Overview)
- Optionally, configure your audio input to minimize background noise (click cog (⚙) → Filters under the “Audio Mixer”). (See this guide)
- Optionally, configure how the video should be encoded and saved (Settings → Output). (See e.g. this guide)
- Click “Start Recording”
- Record your presentation
- Click “Stop Recording”
- Profit!
Setting up video input in obs Studio
First of all, check the obs Studio Overview.
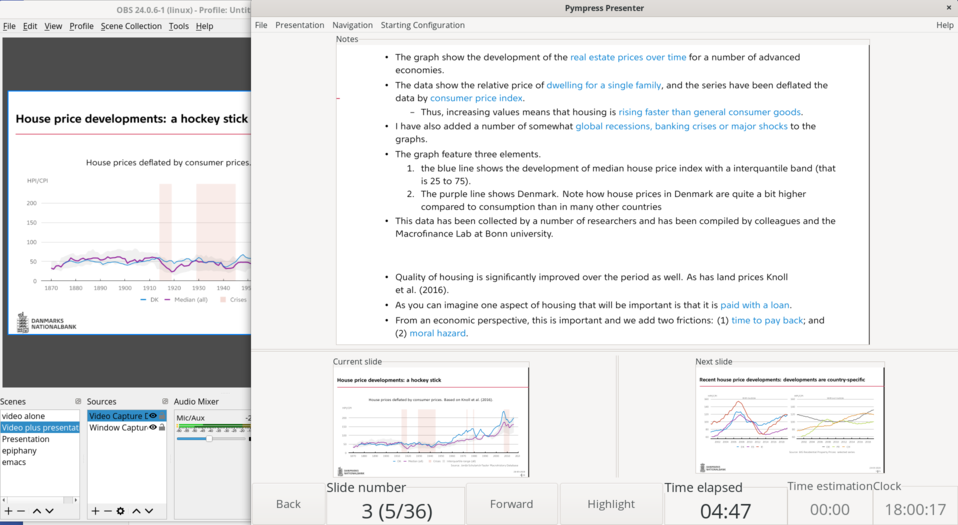
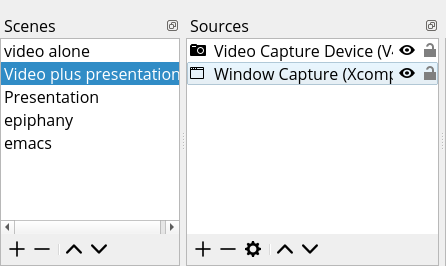
obs Studio operates with scenes and sources as inputs. Sources, e.g. a video stream from a webcam, are composed and combined via scenes. For instance, the picture above combines video from my webcam and the presentation window of Pympress.
First, to add sources click +. The most useful sources for video
lectures are “Video Capture Device” (for webcams) and “Window
Capture”3 or “Screen Capture” for capturing the output of a
presentation. I like “Window Capture” as Pympress can split my
presentation into two windows, allowing me to only capture the
“presentation view” of my slides. During the recording of
presentation, I can focusing on the presenter view with my notes. If
using Screen Capture, the Crop filter might be useful.
Each scene allows you to compose a view of different sources; sources can be used in several scenes, which is necessary for webcams. Different scenes are useful if you want to jump out of your presentation and into your browser or your text editor, say if you want to show a website or some code.
In Settings → Hotkeys you can assign shortcuts to quickly jump from
one scene to another. For instance, I assign a the scene “video alone”
to Ctrl + 1 and “video plus presentation” to Ctrl + 2 and so forth.
Reduce background noise with the obs Studio Audio Mixer
For videos, crisp sound is really important4 imho.
obs Studio has a couple of nice features for recording decent sound. Importantly, the “sensitivity” of the microphone can be set directly in the main view of obs in the “Audio Mixer” section (there may also be an os setting for microphone level).
There are also some useful filters for suppressing background noise. Under the audio mixer, click cog (⚙) → Filters.
I use the following filters, in this order,
- Noise suppression
- The filter can be used for “remove[ing] mild background noise or white noise that may be in any of your audio sources” For my setup −20db seems to work well.
- Noise Gate
Noise gate kills microphone whenever one is not speaking. It will obviously require some fine-tuning, but these values seem to work well for me
Setting Value Explanation Close threshold −50db Turn off mic. at this volume Open threshold −36db Turn on the mic. at this volume Attack time 15 ms Time to turn on mic. Hold time 200 ms Time with silence before mic. turned off Release time 100 ms Time to turn off mic. - Gain
- Add gain (“turn up the volume”) to your sound input.
There is a more detailed guide here.
Note, on my system, the only audio input is Mic/Aux. Screenshots of obs Studio often have several audio sources, like “Desktop Audio”. You will probably want to turn these off, as you would not want to record e.g. notification sounds.
Settings → Hotkeys
A lot of “actions”, like switching scenes, can be done via shortcuts in obs Studio, but they need to be configured. See Settings → Hotkeys.
The most useful configurable shortcuts are start and stop recording and those to switch between scenes.
Video recording settings (Settings → Output)
You can control pretty much all aspects about how videos are recorded in Settings → Output.
The standard encoding settings should be fine; x264 is a widely
supported and at least modern browsers and vlc should come with a
decoder.
You might want to Rescale Output under Settings → Output → Streaming to limit the file size.
Under Settings → Output → Streaming you can decide where videos are saved and the video container format (e.g. mp4).
This guide should give more details, if necessary.
Presentation software: pdfs
I have come across two different pdf presenters that can split the
presenter view and the presentation view into two different windows,
namely Pympress and pdfpc (use the -w both when starting pdfpc).
Both give you a “virtual” laser pointer (Ctrl + click with Pympress
and mode 2 with pdfpc). pdfpc can emphasize parts of the screen (Ctrl
and draw square with mouse) and Pympress can zoom in on a section of
the screen (shortcut z for zoom and u to undo zoom).
Pympress as it works nicely with latex Beamer notes. In pdfpc, you
can add notes in the application with Ctrl + n or use pdf annotations.
Beamer notes don’t work that well with pdfpc.
It’s pretty easy to configure the layout of Pympress.
Presentation software: powerpoint
Microsoft provides a obs and powerpoint guide.
I have not tried to record powerpoint with obs. I would imagine that the Screen Capture source would be the best options, but you might need two monitors.
Bonus: obs Studio output as a virtual webcam
On Windows and gnu/Linux it is possible to make a virtual webcam,
streaming from obs. This is useful for streaming presentations via
standard video conferencing software (like “Skype”). Windows users can
do this with obs-virtual-cam and gnu/Linux user can obs-v4l2sink
and v4l2loopback.
In the future, this might be included in obs Studio itself (see this rfc discussion).
Footnotes:
For “live” lectures, academics seem to have adopted Zoom. The company behind Zoom seems pretty dodgy and their web client is always nagging you to download their desktop app (see also the zoom-redirector browser add-on). Jitsi might be an floss alternative to Zoom?
To me, video seminars where you can see the presenter are a bit more interesting than videos where you are only presented with the slides and voiceover.
On my system I had to check “Swap red and blue” in the window capture properties to get the colors rights.
Ideally, I guess one should acquire a nice microphone for recording video lectures; I haven’t.